RSS Feed

Author Archives: Isn't Life Sweet

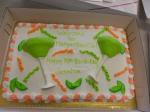
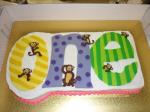
Fancy Shoes, Monkey Heads & A Book Of Love

You never know what a new week brings in the cake business. Here are a few of our recent faves!

A Few Fun New Cakes!

We always love a challenge at Isn’t Life Sweet, even more when it’s fun! Here are a few recent cakes that had us thinking “outside the box.”

If you like these samples, stop by our Facebook page to see lots more!

Creating Molded Chocolate Treats (Part 2 of 2)

by Sherry Nixon

Last time, we ran through the basics of creating molded chocolate. If you’ve been successful doing that, maybe you’re ready to get more adventurous and add colour to your creations. Many molds have details that are made to be coloured, so use your imagination!

You’ll need a separate paintbrush for each colour and it’s important to let each area set before painting the next one, so they don’t run together. You shouldn’t need to refrigerate or freeze these, as they’ll set quickly but, if you do, make sure you let them return to room temperature before the next step or the different colours won’t fuse. Once you’ve got all the details done and they’re set, you can fill the mold with the rest of the chocolate and follow the steps from Part 1 above to set the chocolate.

For even more adventures, try creating a larger, hollow-filled chocolate like a bunny or an egg. Molds for these designs come in two halves. Fill one half with chocolate, clip the two pieces together, invert the mold and swirl the chocolate around so it’s evenly distributed over the two molds. When you chill it, take it out after a couple of minutes and swirl again, so you’re left with a nice even hollow chocolate.

If hollow treats just don’t satisfy your chocolate cravings, it’s easy to make filled creations, too. Simply fill both halves of your molds and allow them to set. Once they’re ready to go, make sure the top side of each half is flat, shaving off any excess. After that, apply a thin layer of warm chocolate to one half, press the halves together and allow them to set and form a perfect filled chocolate delight.

Once you’ve sharpened your skills, the next challenge is making your own filled chocolates. You can choose from a variety of different shaped and sized molds and be as plain or daring as you like with your fillings. To make the actual chocolates, paint in the details first and let the colours set, then paint the sides with chocolate, being careful that you’ve covered all the exposed areas.

Once that’s set, add your fillings and fill the rest of the mold with chocolate just up to the top, making sure the edges are sealed. Chill as normal and in a few minutes you’ll have some delectable handmade chocolates that are perfect for gifts or just to satisfy your own sweet tooth. Practice makes perfect, so you don’t want to be gifting until you’ve sampled all your products to ensure quality control!

After you’ve finished making chocolate for the day, don’t forget to take proper care of your clear plastic molds. These molds are made from a special plastic, which allows your chocolates to slide out easily, but they also require a bit of TLC. Be careful to clean them with warm (not hot) water and no dish soap or detergent, otherwise they’ll begin to crack and deteriorate. Dry them gently with a clean towel or allow them to air dry.

After time, the chocolate may start to stick. If this happens, give your molds a light spray with vegetable oil, allow the molds to sit overnight and gently buff them with a clean cloth to remove any oil. With proper care, you should get years of use and enjoyment from your molds.

I’ve tried to touch on the basics of making chocolates but, as you might expect, there’s much more to learn and experiment with. If you want to know more, visit isntlifesweet.com. As well, there are plenty of great books and articles you can explore – or you can even take a class to learn some amazing new tips and techniques. Happy choclatiering!

Creating Molded Chocolate Treats (Part 1 of 2)

by Sherry Nixon

With Easter on the way, it’s a perfect time to think chocolate. Of course, when ISN’T it a perfect time to think chocolate? You can always take the easy way out and pick up pre-made packaged chocolates. But, this year why not consider making your own? It’s a lot easier than you think – and it makes a perfect activity with kids of virtually any age, even grown-up kids!

The first thing you need to know is that there are two types of chocolate – “real” chocolate and chocolate melting wafers. The former must be tempered and is difficult to handle so, instead, I recommend wafers. They’re easy to work with, have a great chocolate taste, come in a variety of colours and are readily available at most bulk stores, craft stores and candy making suppliers – including Isn’t Life Sweet.

You’ll also need to decide beforehand what you’d like to make – solid or hollow chocolate treats, suckers, filled chocolates or whatever else you can think of. If you’re short on ideas, try the location where you found your chocolate wafers. They’re sure to have plenty of molds plus other candy-making supplies, including sucker sticks, colours, decorations, etc.

Now that you’ve got all your supplies ready to go, it’s time to make some chocolates. The first (and most crucial) step is melting, which must be done gently and never over direct heat. The most reliable way is to place your bowl of chocolate wafers in an electric frying pan filled with water that’s warm enough to melt the chocolate, but cool enough to put your finger in. Usually, “simmer” is a perfect setting. Alternately, a double boiler works great.

The simplest method is to put your oven-ready bowl of chocolate in a microwave. Start out with the timer set for one minute, remove the chocolate and stir, then repeat in decreasing intervals of 45 seconds, 30 seconds, etc., being sure to thoroughly stir the chocolate each time.

Whatever method you use, the ultimate goal is to have chocolate that pours easily and contains no lumps. If you overheat the chocolate it will harden and there’s no way to save it. So, slow and easy does it! It’s also important that no water, milk, alcohol, water-based flavours or liquid food colours come into contact with the chocolate or, once again, it will be ruined.

While your chocolate is warm, carefully pour or spoon it into your molds. Try to be as accurate as you can, as it will save you time trimming off the excess later and make for cleaner, more professional looking results. You want to fill the molds right to the top, but it’s always better to slightly underfill than overfill. If you’re making suckers, now is the time to insert the sticks into the slot on the mold, making sure the end of the stick is entirely covered in chocolate.

Once the molds are filled, tap them lightly on your table to remove any air bubbles or pop the bubbles with a toothpick or pin. Transfer them to the fridge or freezer for a few minutes to allow them to set. Once the chocolate is set, remove the molds from the freezer, invert them over a baking sheet or your table and, if properly set, the chocolates should fall right out. Make sure you hold the mold close to the table to lessen the chance of breakage and, if desired, have a piece of Styrofoam or clean towel to catch the falling chocolate.

If the chocolate is difficult to remove, give the mold a slight tap or twist it gently. If you’re still not having any success, your chocolate is probably not set and should be returned to the freezer or fridge for an additional few minutes. Voila, you’re a chocolate maker!

Next time, we’ll go beyond the basics to discover some other delicious treats you can experiment with.

Thanks, Tania!

by Sherry Nixon

We hope you’re loving the look of our gorgeous new website. Just in time for Spring, we’ve got a fresh, bright, beautiful place for visitors to come and explore.

Many, many thanks to Tania DeJonge from www.adrivendesign.com for creating the new look. She did a truly awesome job and was so easy to work with. Check out her website and see some of her other amazing creations.

Please let us know your thoughts on the new site and your suggestions for other things you’d like to see or read about on our blog.

Watch for lots of other exciting things happening at Isn’t Life Sweet, too!

Top 10 Questions You Should Ask Your Wedding Cake Designer (Part 2 of 2)

by Sherry Nixon

In Part 1, we talked about some of the preliminary questions you should ask your potential wedding cake designer. That was just a warm-up to the Top 5 Questions, which will prove to be invaluable in helping you make your ultimate choice.

5) Do you do custom designs and are you comfortable working with my ideas? Technically, that’s two questions, but they go together like fondant on buttercream. A wedding cake should really be a reflection of the bride and groom’s ideas, at least in my opinion. However, some cake decorators are more comfortable working with a set number of designs – and their clients seem to be happy with choosing from the available options.

If you’re more inclined to “have it your way,” though, you really need to ask your designers about custom options and see whether they’re confident and skilled enough to bring your ideas to life. A good way to gauge their abilities is to look at some of the previous designs they’ve created and ask them to describe the process of taking a client’s original ideas and transforming them into an actual cake.

4) Can you supply the decorations I need (cake toppers, pillars, stands, fountains, knife/serving sets, etc.)? When you’re ordering a cake, there’s a lot more to consider than just the cake. Most full-service cake shops should be able to provide you with all of the above. By having this option, it may save you a lot of running around, searching for all the separate items, something you may not have time to do with an entire wedding to coordinate. Just make sure you’re aware of any extra costs that may be involved and, if you’re renting, when the decorations need to be returned.

3) Do you deliver and set up? This is almost a multiple part question, because there are so many things to consider. In addition to knowing that your cake designer delivers, do they also set up and ensure your cake table is properly decorated when they leave? Will they coordinate the delivery with the hall decorator and, as previously mentioned, the florist? Are they prepared to make emergency repairs on-site? And, perhaps most important, what is the cost and what does it include?

2) Do you have a portfolio I can view? You can never spend enough time looking at a cake designer’s portfolio. It will give you a definite idea of both the quality and the flexibility of their work. Whether you’re thinking of a tiered cake, individual cupcakes or a slab cake, you should make sure there are plenty of examples of the type you’re planning to order. Ideally, there should also be a number of artificial cakes on display at the store, so you can examine the quality of the decorating work with your own eyes. The more of the designer’s work you see, the more comfortable you’ll be with choosing them to design your custom wedding cake.

1) How much will it cost? This seems like a no-brainer, but it’s crucial that you ask as many questions about the cost as possible. Does the shop price by the cake or by the slice (the former is usually more cost efficient)? Is the delivery extra? Are there any extra costs I should be know about? What’s the final total – and can I get it in writing? Any reputable shop should be able to give you an exact quote for the total with everything included, so there are no surprises when you get the final bill.

Of course, there are plenty of other questions you should also ask, especially if you have unique needs like recreating a family cake recipe or special dietary considerations. However, if you start with the ten most important questions listed above, you’ll be well on your way to having the wedding cake you’ve always dreamed of!

Top 10 Questions You Should Ask Your Wedding Cake Designer (Part 1 of 2)

by Sherry Nixon

As a wedding cake designer and decorator, clients routinely ask me dozens of different questions about their wedding cakes. Some of them are crucial – others, not so much. The main reason to ask questions is so you’ll feel comfortable and confident with the cake designer you eventually choose. Ask as many questions as you need, but make sure you include the following Top 10:

10) Do you allow tastings? It’s surprising how many brides never ask this question. Certainly, how your cake LOOKS is a primary concern. But, shouldn’t you also be concerned about how it TASTES? Everyone has their own likes and dislikes when it comes to cake and icing flavours, so this should really be a big part of choosing your designer.

Something else to consider is the huge variety of flavours available today. Many of them look exotic and tempting, but are your guests going to enjoy something “unique” – or would they just prefer the standard, time-tested white cake? Certainly, if you do decide to try something “unusual”, you’ll want to taste it beforehand and, perhaps, make it one of several options on your tiered cake.

9) How far in advance do I have to book and what do you require for a deposit? Couples choose their wedding date and book their banquet halls more than a year in advance, but booking your cake early is just as important. Typically, cake decorators are booked up everywhere from several months to two years in advance and certain key dates always fill up fast. Therefore, it really pays to start thinking about your cake designer early and be sure to have them save your date.

Most decorators ask for a fairly minimal deposit, just to hold the date (ours is $50.00). It certainly pays to shop around, ask what’s included in the deposit and find out when the final balance needs to be paid.

8) I want to use real flowers. Can you coordinate with my florist? Here’s a question a lot of brides completely forget about – but it’s so important. Most cake designers don’t consider themselves to be floral arrangers, so they need to be able to coordinate the colours, floral layout and delivery time with the florist beforehand. If you’ve got your heart set on a cake with real flowers, you definitely need to confirm this with your decorator first.

7) Do you make sugar paste, gum paste, chocolate or fondant flowers or accessories? If you’re not planning to have real flowers on your cake, perhaps you’re considering some alternate decorations. Creating artificial flowers or accessories on cakes is a service that some cake designers may not be prepared to offer. It’s best to find this out right from the start, in case you need to source out this part of the cake or talk to other designers.

6) How can I maximize my budget? Many brides seem reluctant to ask this question – but they shouldn’t be. Times are tight, wedding budgets are going through the roof and many brides are looking at ways to economize. Experienced designers can give you some simple ways to keep your costs down, like including one or two artificial tiers in your cake.

On the other hand, no one wants to feel they’re being taken advantage of, whatever kind of service they’re providing. So, by all means ask for the best way to get a beautiful cake within your budget. But, don’t put your designer in an awkward position by asking them to lower their prices, just to save a few dollars.

Next time, don’t miss the Top 5 Questions You Should Ask Your Wedding Cake Designer. These are definitely the “must-ask” questions you can’t afford to forget!